...
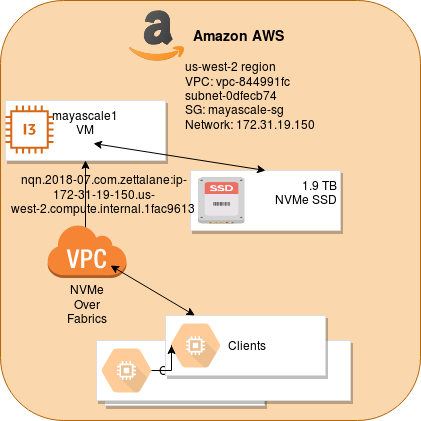
- 1 EC2 instance
mayascale1 - 1.9 TB NVMe SSD (ephemeral)
- Default network with private IP 172.31.19.150 (ip-172-31-19-150.us-west-2.compute.internal)
Permit port 4420 which is the default port for NVMeoF TCP traffic
Connect to the MayaScale Cloud Data Platform instance using SSH to secure the Web console GUI access by changing the default password to something random by running
Code Block language bash # /opt/mayastor/web/genrandpass.sh
Or to set your own password
Code Block language bash # /opt/mayastor/web/changepass.sh Login name (default admin): Login password: Password again:
And then restart the web server for password changes to take effect
No Format # /opt/mayastor/web/stop # /opt/mayastor/web/start
Now you can proceed with provisioning NVMe storage using the Administration Web console available on http://<mayanas<mayascale1-ip>:2020
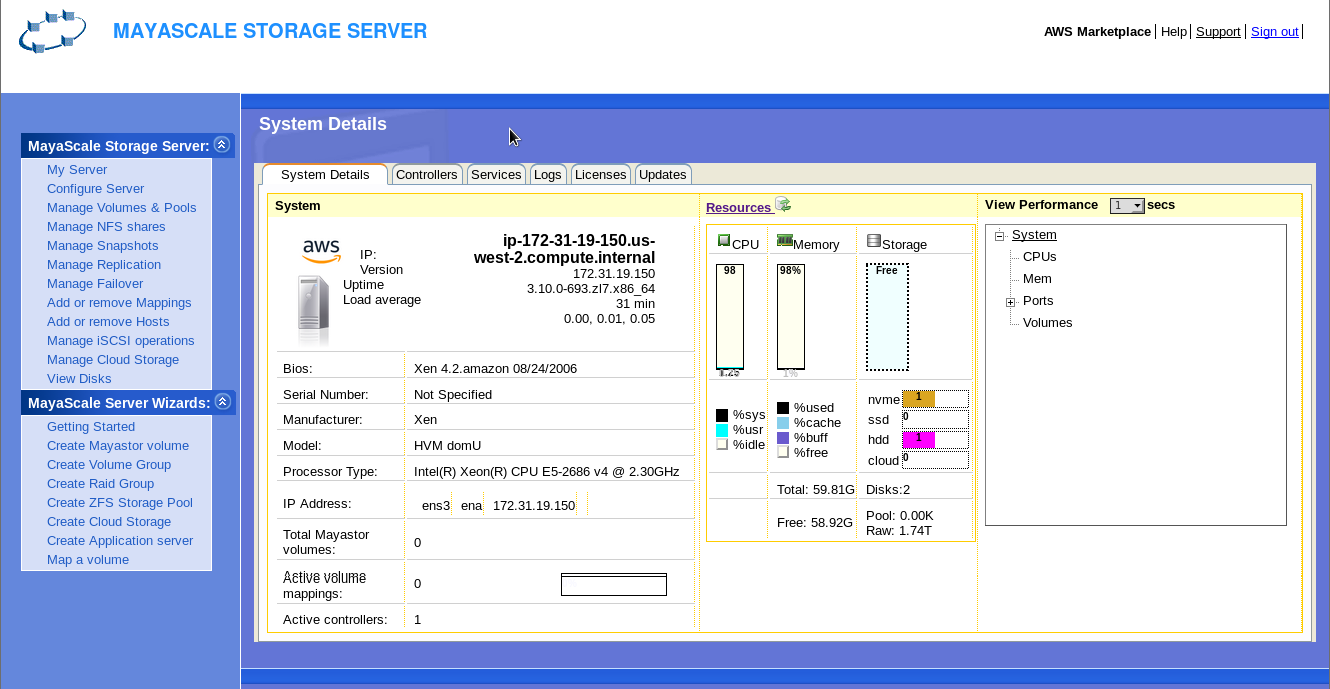
Based on the number of NVMe SSD that is available on the instance you will be able to view them on the GUI from View Disks
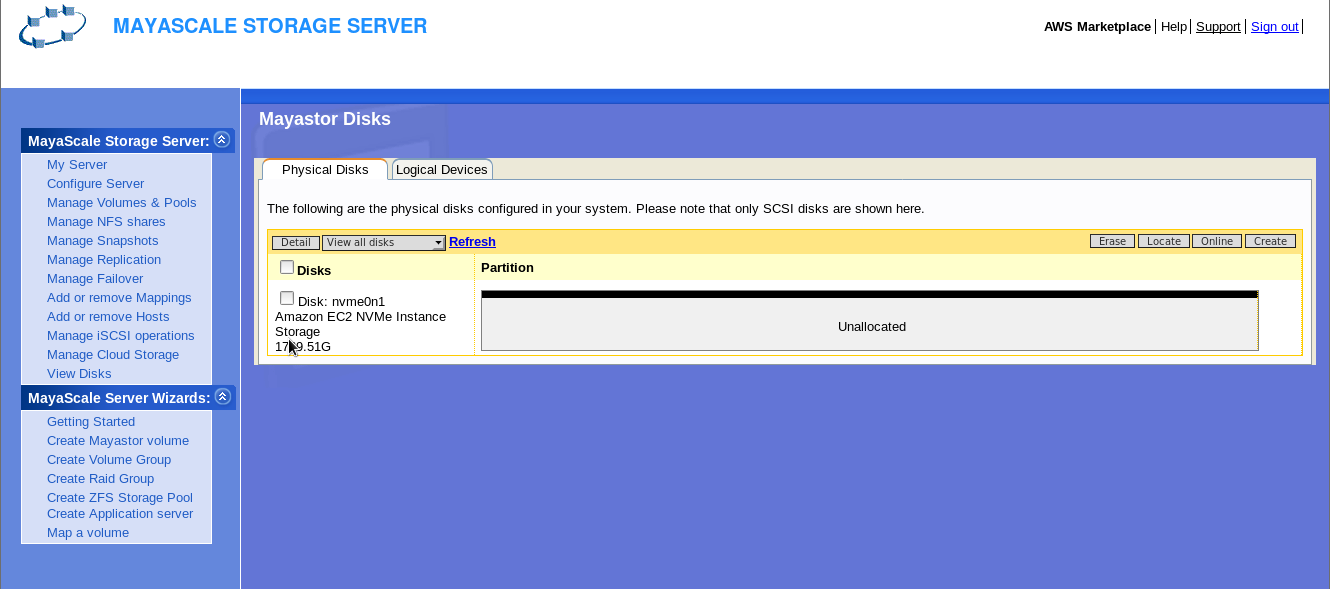
For provisioning NVMe storage to clients you can create volume group from the physical NVMe and then slice them as logical volumes for flexible provisioning. But for this guide we will be provisioning the whole NVMe resource to client.
Using Mayascale Server Wizards → Create Mayastor Volume. Then Select Simple Volume and click Next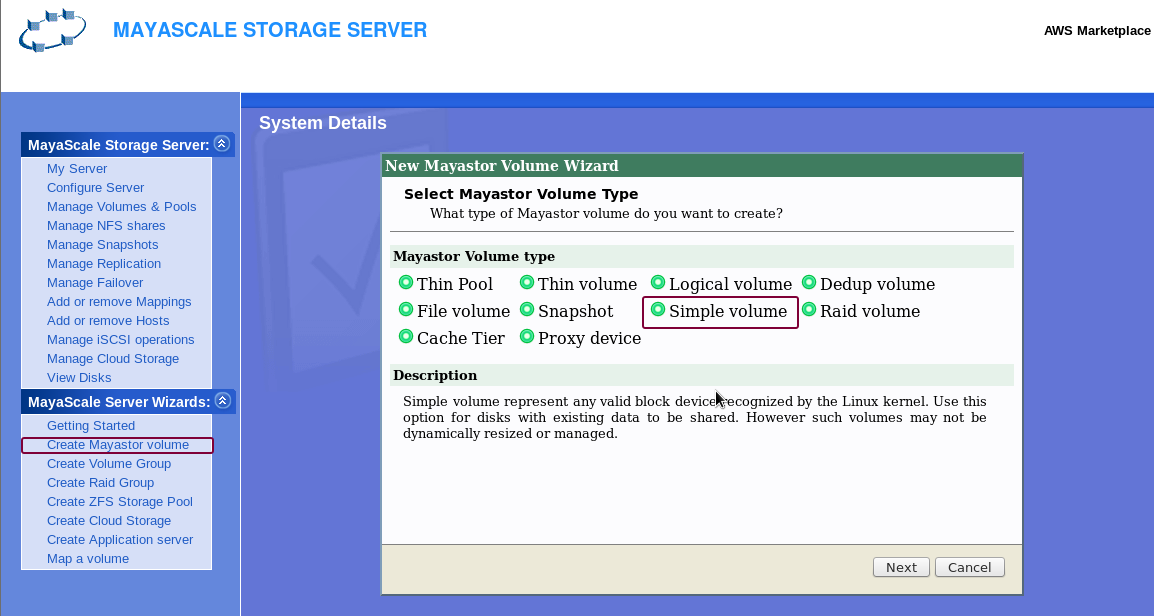
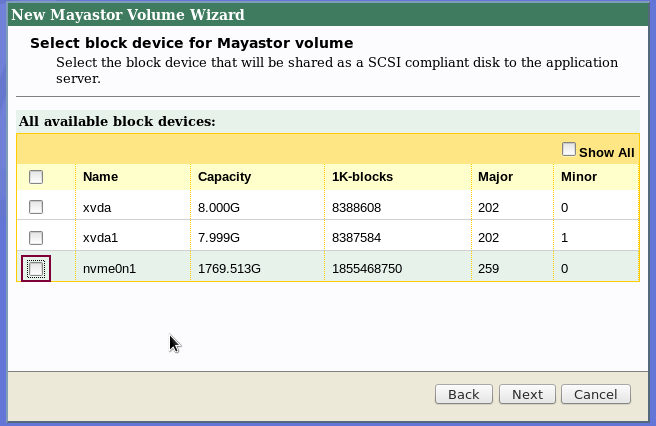
Select the device for provisioning and click Next. In this example nvme0n1 is chosen.
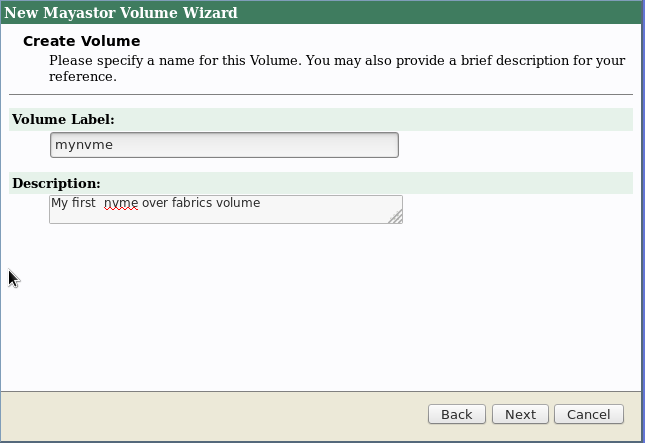
The next screen is to specify a name for the provisioned volume with brief description.
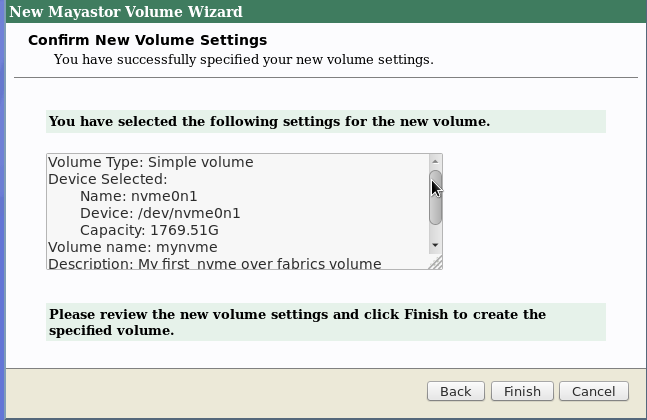
Confirm the new volume settings.
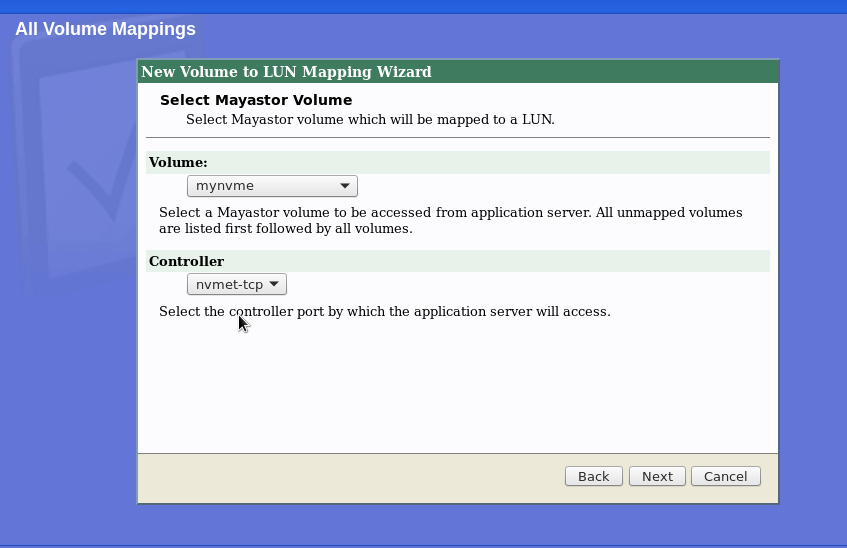
- Once the volume mynvme was created successfully the next step is to make them available to clients using the NVMe TCP protocol. For this use the wizard Map a volume . Here select the newly create volume mynvme and choose nvmet-tcp as the controller. For iSCSI provisioning the controller will be iscsi. Then click Next
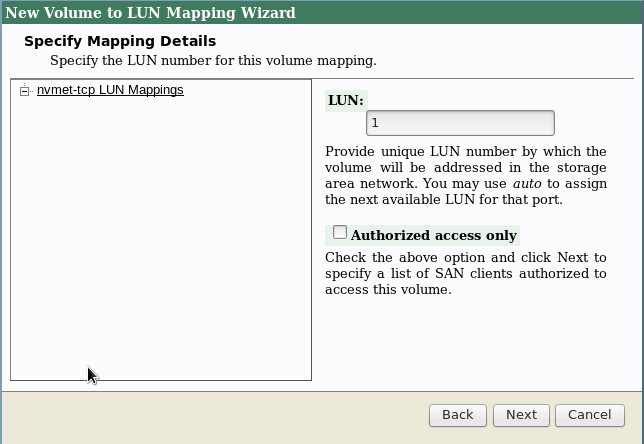
- Here the LUN refers the NVMe namespace id and it starts from 1. For iSCSI the LUN starts from 0.
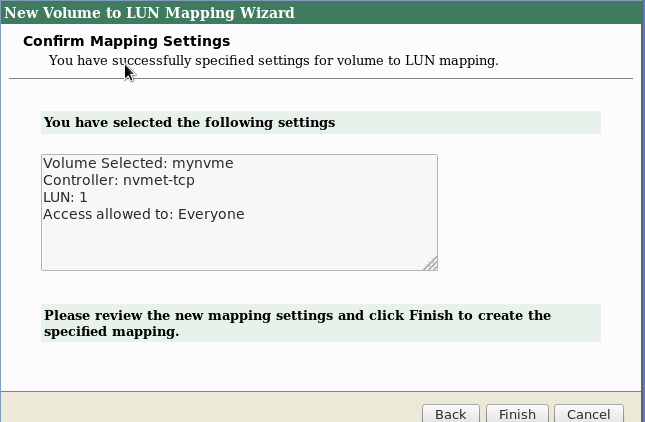
- Confirm mapping settings.
- Once mapping was created successfully it can be viewed by clicking Add or remove Mappings from the sidebar. Here you would notice the default NQN for the new volume.
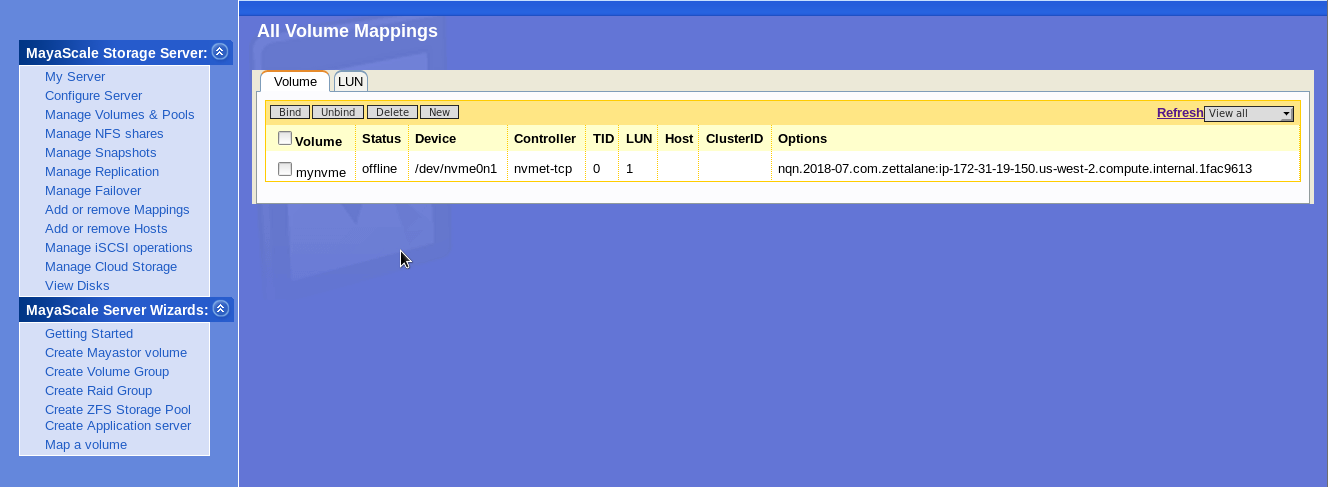
The next step is to activate the newly created mapping so that it is discoverable from NVMe hosts in the network. To activate click on the checkbox associated with mynvme
and click Bind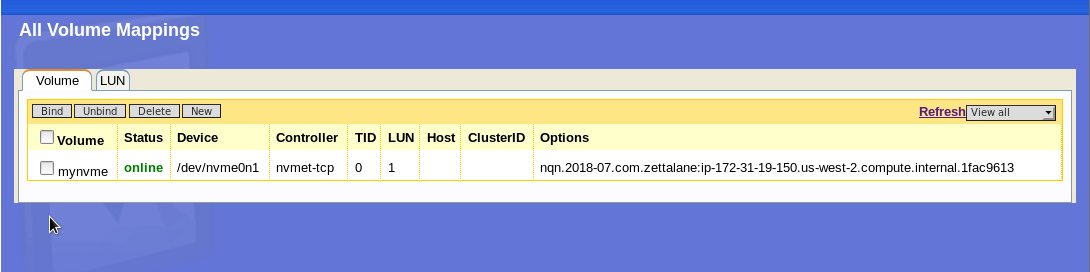
To discover this NVMe target from another client with NVMe over fabrics support.
Code Block language text theme RDark [root@ip-172-31-20-45 ~]# modprobe nvme-tcp [root@ip-172-31-20-45 ~]# /opt/zettalane/bin/nvme discover -a 172.31.19.150 -s 4420 -t tcp Discovery Log Number of Records 1, Generation counter 1 =====Discovery Log Entry 0====== trtype: tcp adrfam: ipv4 subtype: nvme subsystem treq: not specified portid: 0 trsvcid: 4420 subnqn: nqn.2018-07.com.zettalane:ip-172-31-19-150.us-west-2.compute.internal.1fac9613 traddr: [root@ip-172-31-20-45 ~]#
For the client to perform IO on the discovered NVMe target, it has to be connected and configured with the host as follows.
Code Block language text theme RDark [root@ip-172-31-20-45 ~]# /opt/zettalane/bin/nvme connect -a 172.31.19.150 -s 4420 -t tcp -n nqn.2018-07.com.zettalane:ip-172-31-19-150.us-west-2.compute.internal.1fac9613 [root@ip-172-31-20-45 ~]# /opt/zettalane/bin/nvme list [root@ip-172-31-20-45 ~]# /opt/zettalane/bin/nvme list Node SN Model Namespace Usage Format FW Rev ---------------- -------------------- ---------------------------------------- --------- -------------------------- ---------------- -------- /dev/nvme0n1 vol047c5ca2e5ca231b8 Amazon Elastic Block Store 1 0.00 B / 8.59 GB 512 B + 0 B 1.0 /dev/nvme1n1 7e2888517b895b8 Linux 1 1.90 TB / 1.90 TB 512 B + 0 B 3.10.0-6
- Congratulations you have created NVMe target with MayasScale and mapped over NVMeof-TCP successfully to be discovered by clients.