1. Connect to newly launched VM
instanceInstance
- Using RDP client connect to MayaData VM instance with the default account name and initial password configured by the cloud provider.
- Change the default password to your own password.
- Optionally create additional users if needed.
2. Launch Administration console
Launch vfsadm Administration Console from the shortcut link in Desktop and Run as Administrator
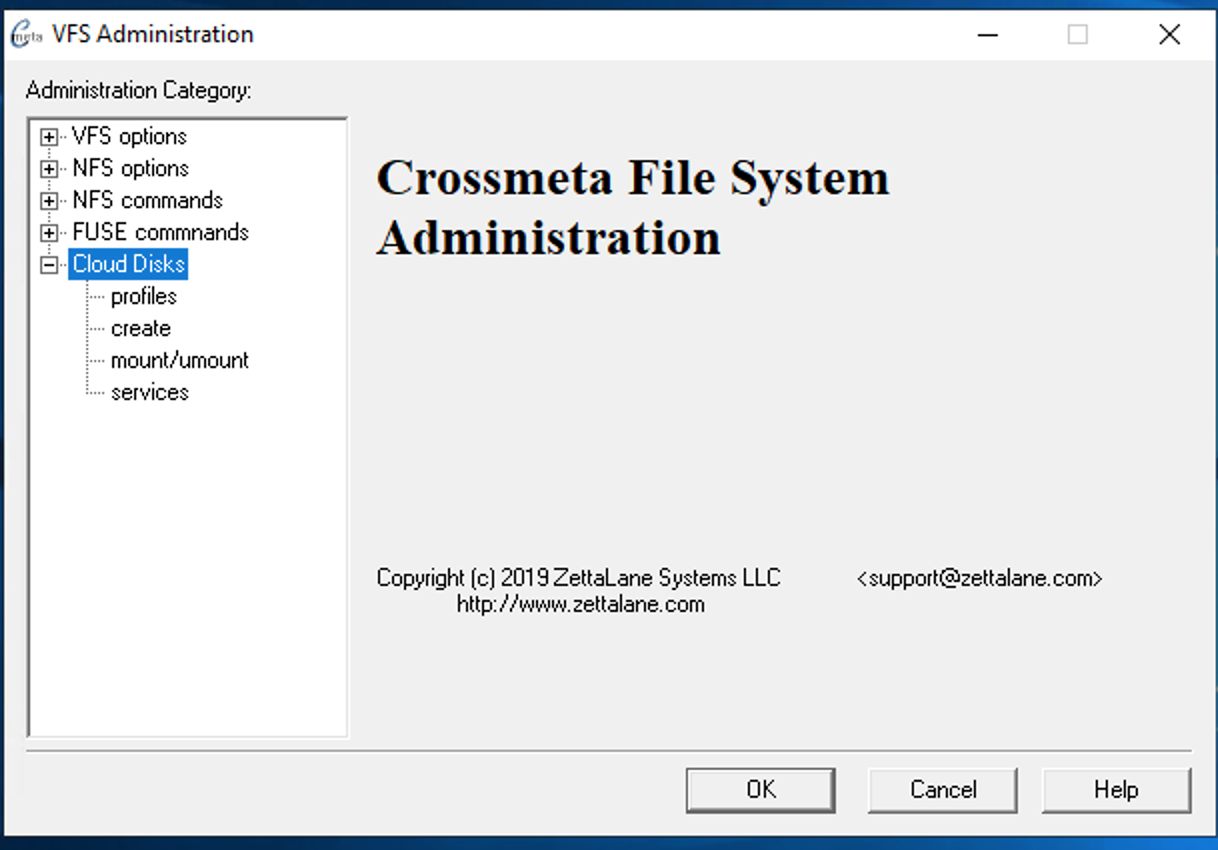
Expand the Cloud Disks in the tree view pane to reveal the following management options
| Panel | |
|---|---|
On this page:
|
3. Create Cloud Profile
Use profiles → New to create a cloud profile that provides relevant information for accessing the cloud storage from application. To start with the configuration you would need access ID key and secret key generated by your cloud provider from their console settings. It is also possible to skip providing this information, if the compute engine was already authorized to perform S3 object access operations through IAM settings.
Tip title AWS EC2 For AWS EC2 instance created with IAM role that authorizes S3 operations it may not be required to configure the accessId and accessKey within the software. Instead use the option --accessEC2IAM=ROLE option with objbaker. This will acquire S3 credentials from EC2 machine
instance-data via http://169.254.169.254/latest/meta-data/iam/security-credentials/ROLE every five minutes.
Use profiles → New to launch the following dialogs.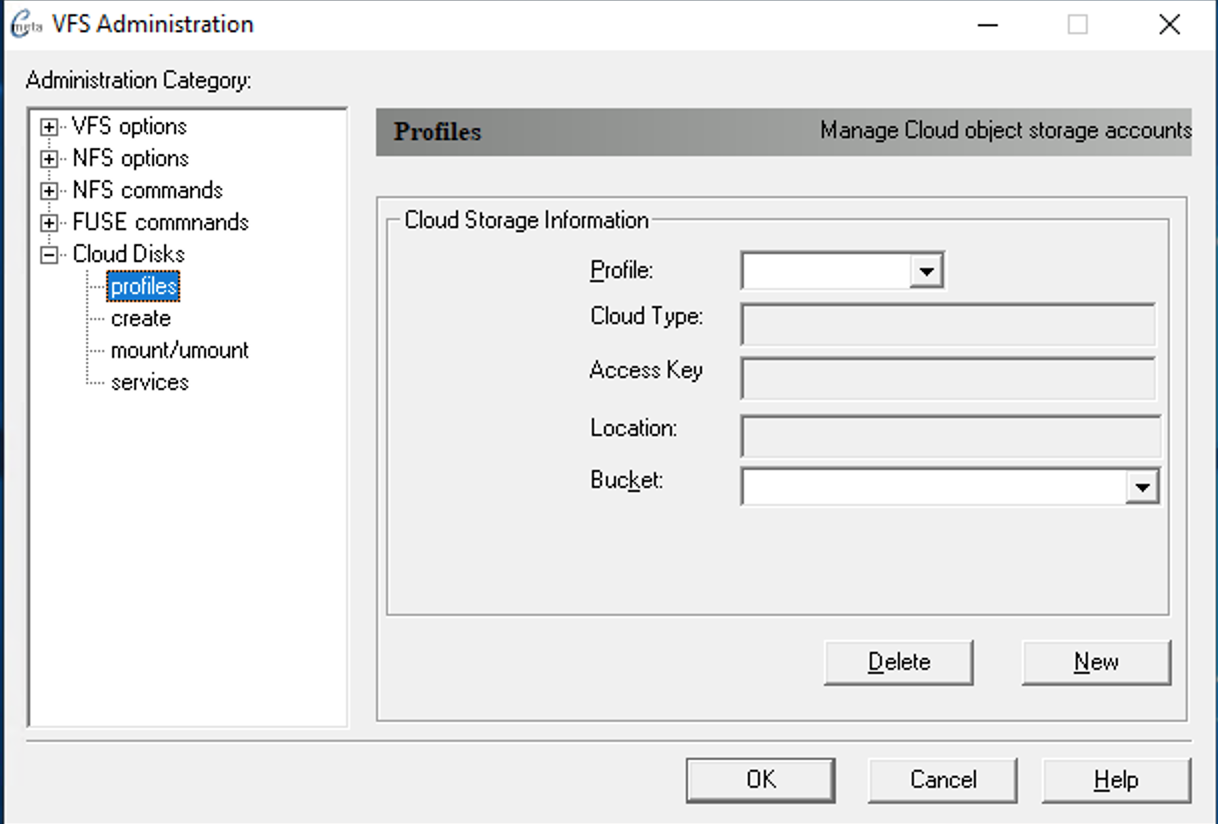
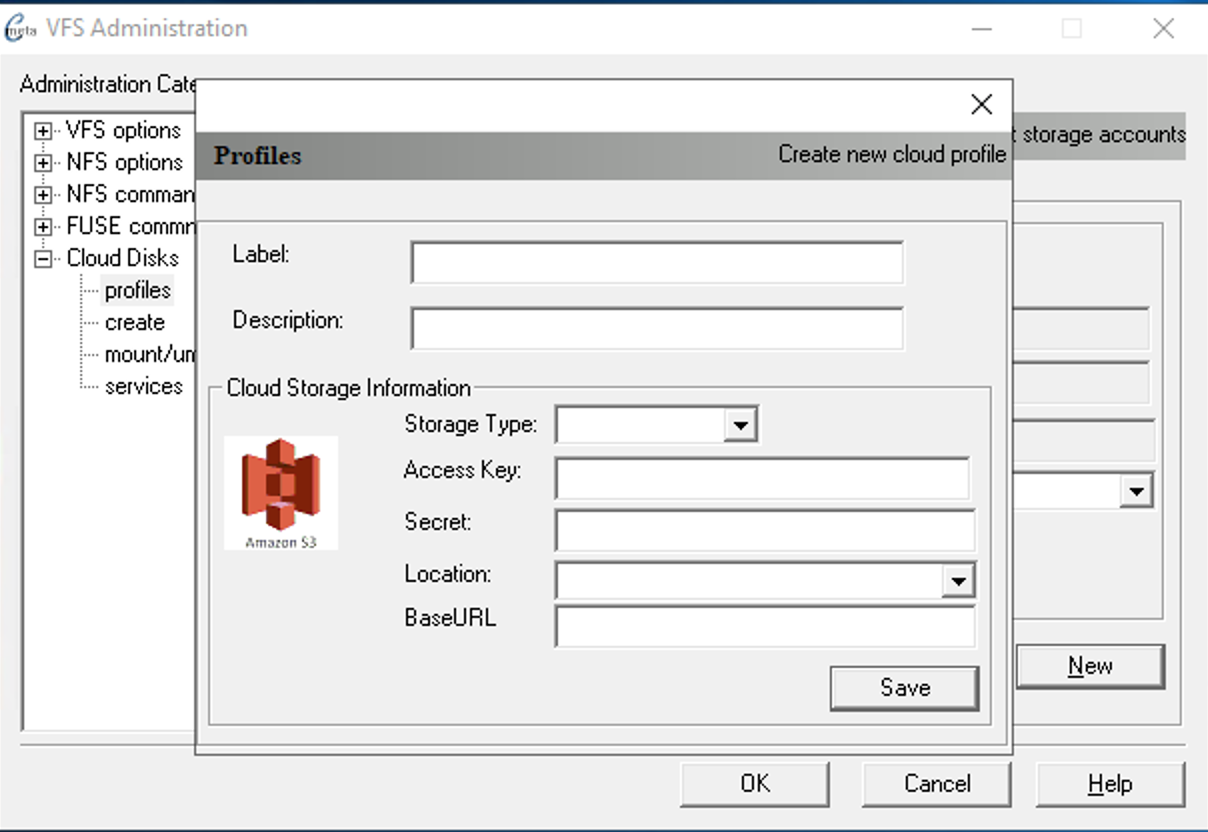
The following dialog shows how to configure cloud profile for Wasabi Technologies which comes
under Other S3 generic
category. In this configuration BaseURL is required to match their service URLs
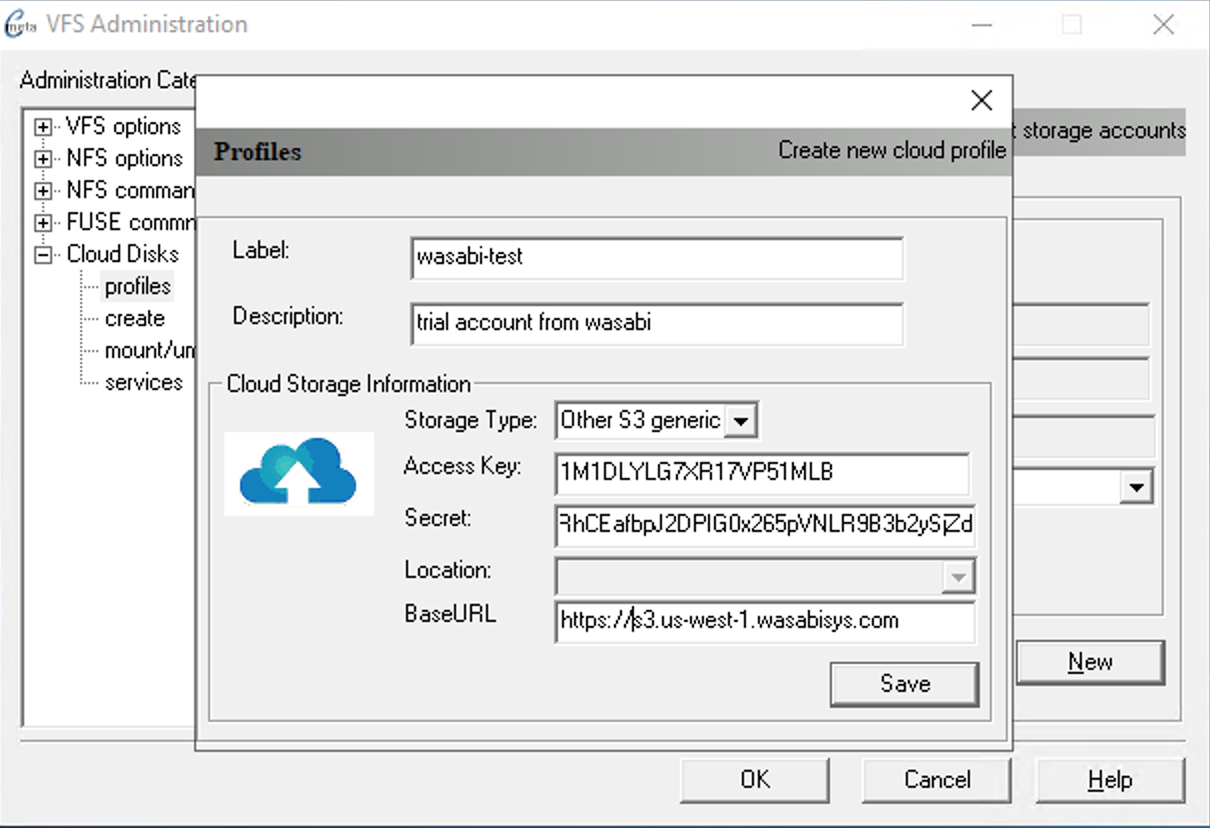
Once configured it will provide a list of bucket/container names that is currently present.
| Panel | |
|---|---|
On this page:
|
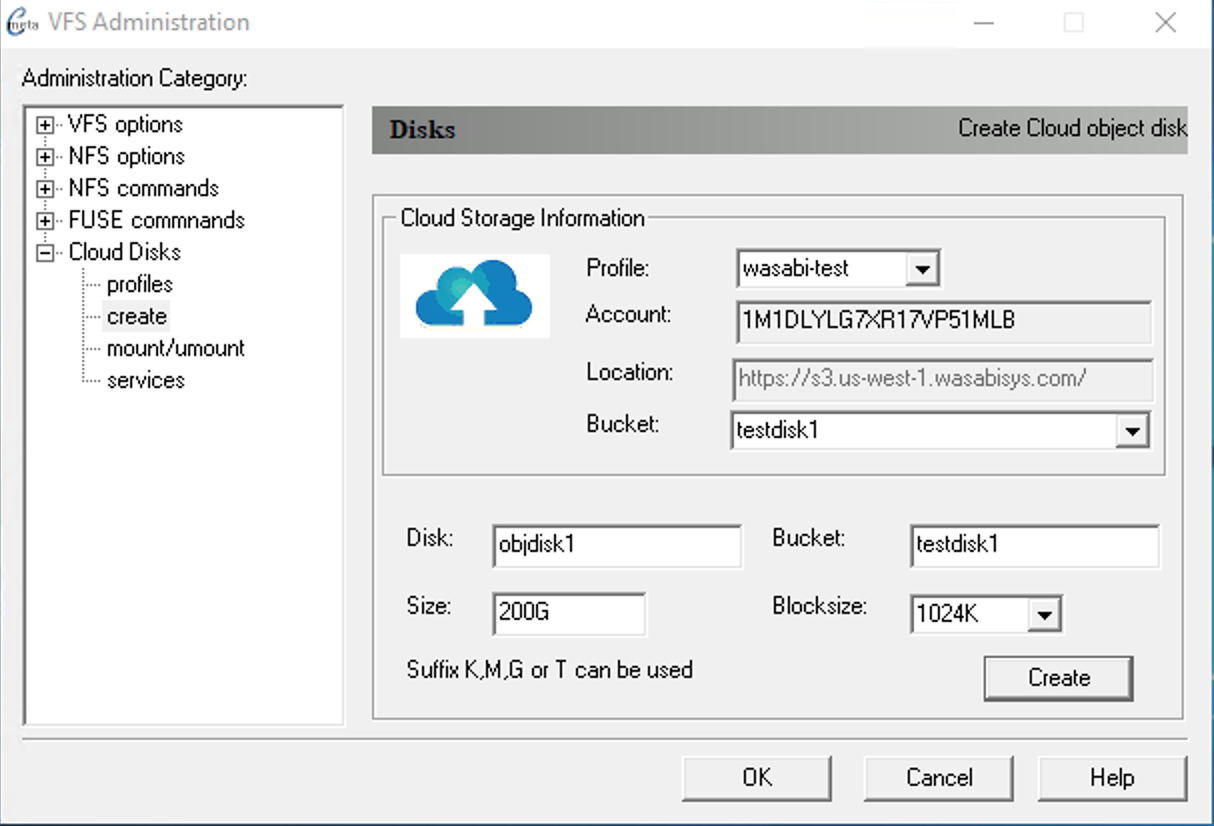
4. Configure your first object storage disk
Select the cloud profile to use to create for creating object storage disk. You can select an existing Bucket from the list or enter one manually which will create a new bucket for you. Logical size of VHDX up to 64TB allowed by Windows. Fill in the following information for the new Disk
- Enter Disk name, which maybe same as bucket name or different.
- If you selected existing bucket the Bucket will be autofilled, otherwise enter a new bucket name to be created.
- Enter Size for the Disk representing the Bucket. This is only a logical size while the bucket storage size is physical. Logical size of VHDX up to 64TB allowed by Windows.
- Select the Blocksize of the physical blocks in the cloud bucket. This would normally match the application blocksize for optimal performance. For NTFS it would match the cluster size of the file system.
- Click Create to proceed with the configuration.
5. Register the object storage disk as service
- Once cloud disk was setup you can setup Register it it as service program from the right-click so that it is available automatically on system startup.
Right-click on Disk and select Register from popup menu.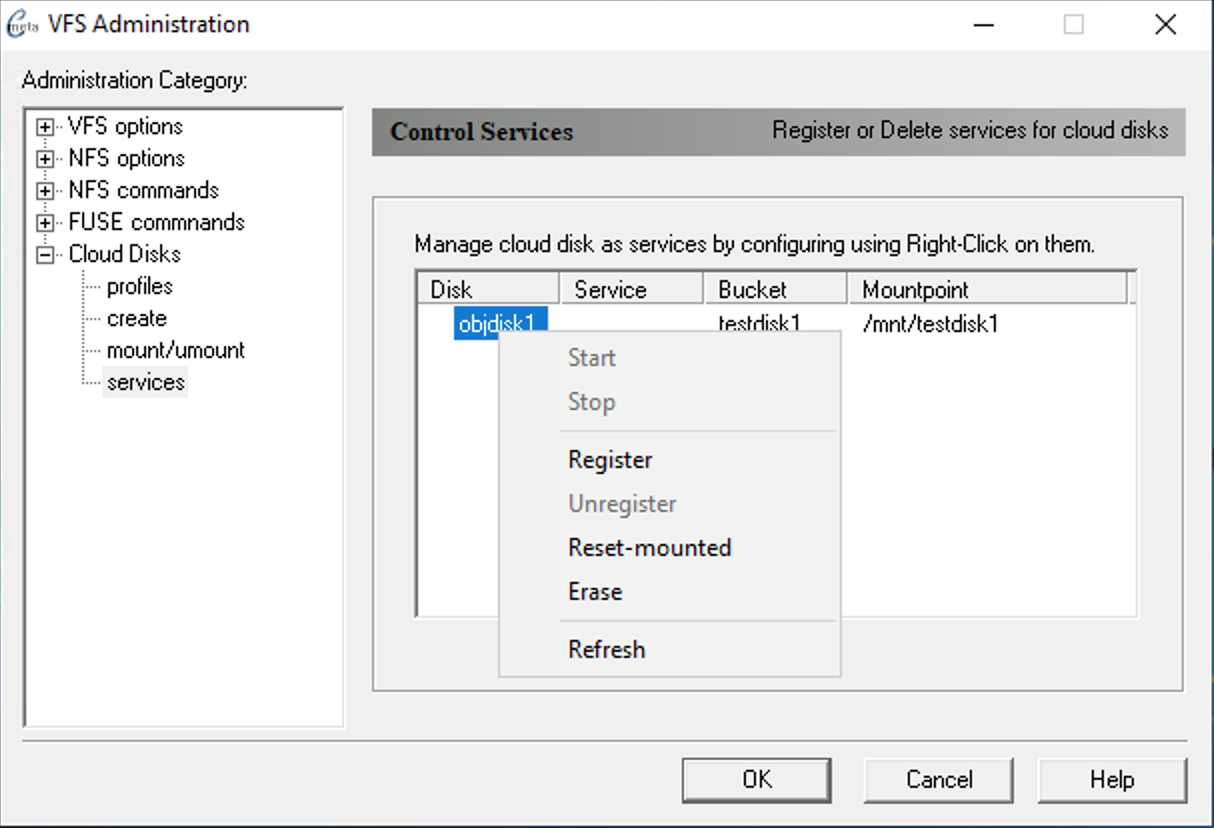
 Configure object storage as VHDX
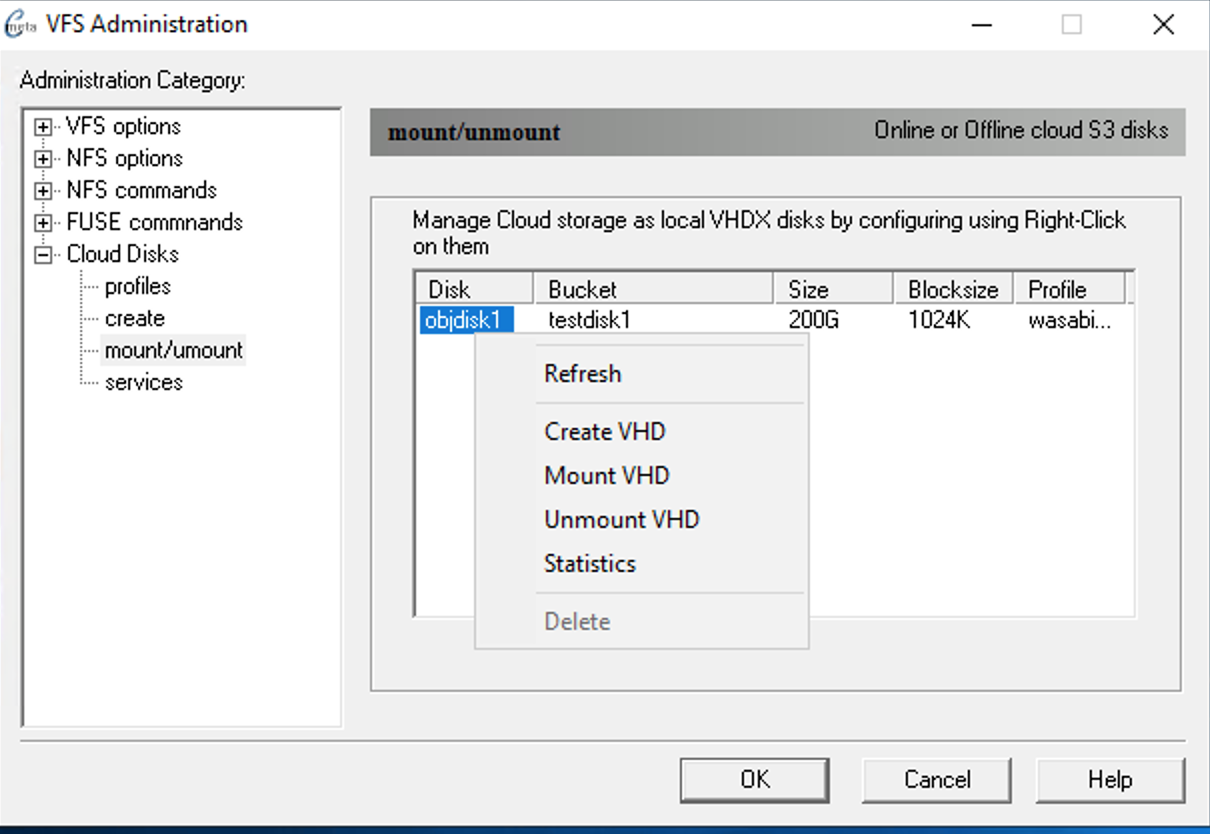
For Windows to make use of object storage bucket we have to initialize the object storage as VHDX image. VHDX is preferred over VHD because of inherent journal feature to protect against unsafe shutdown and also it can support up to 64TB for a single image.
Mount object storage bucket
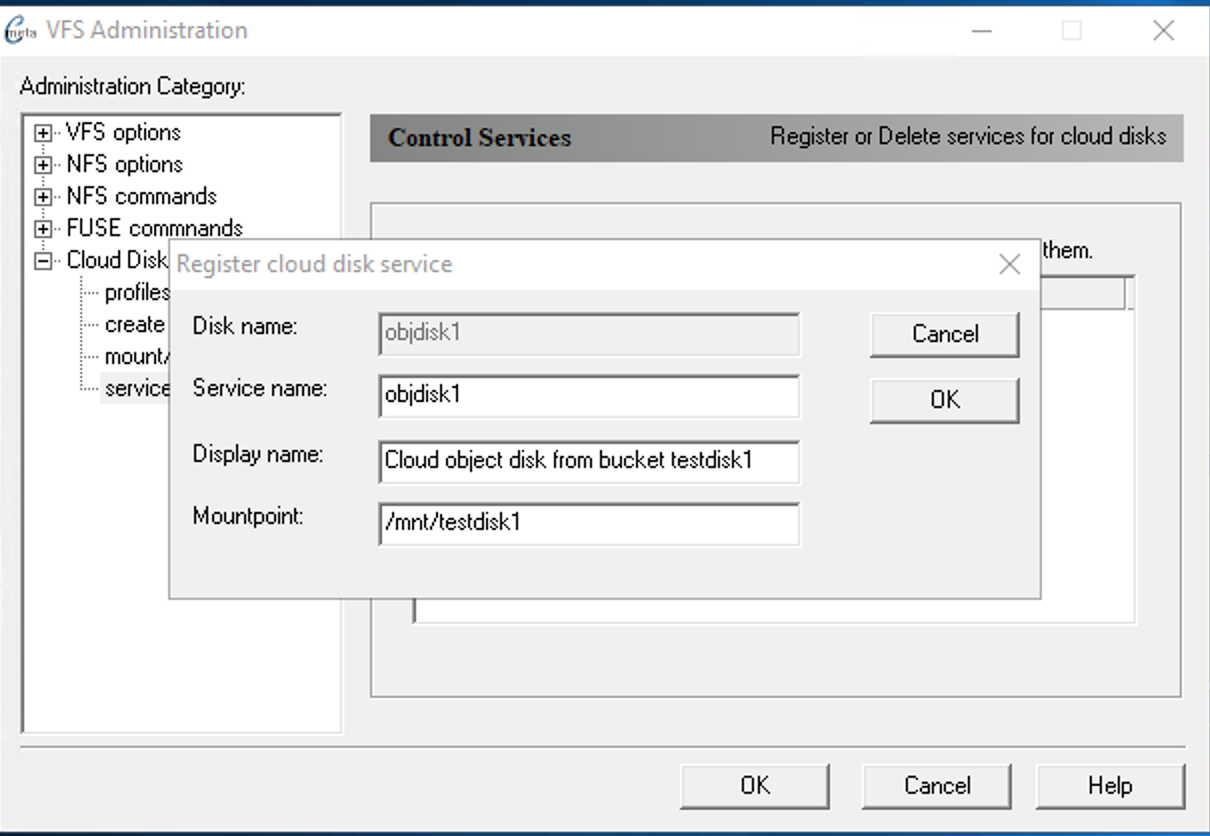
For Windows to make use of object storage bucket we have to intialize the object storage as VHDX image. VHDX is preferred over VHD because of inherent journal feature to protect against unsafe shutdown and also it can support up to 64TB for a single image. This step is performed in foreground interactively to make sure it is working before configuring it as service later. In the following example object storage bucket smbtest1 is being mounted. Please make note of the -f option for foreground. Also for filename we chose as extension .vhdx - In the Register cloud disk service you may accept the default values or change accordingly.
To start the service Right-click on Disk and select Start from popup menu.
Warning title Reset-mounted flag If starting the service after unclean shutdown of earlier successful mount it is required to clear the mounted flag by selecting Reset-Mounted menu option and then attempt to start the service.
After the above command finishes the object storage is accessible as V V:\mnt\file.vhdx as as one giant file with and in this example it shows logical capacity as 10TB.
Activate VHDX file as virtual disk in Windows with Mount VHDXCode Block title qemu-img C:\Program Files\qemu>dir v:\mnt Volume in drive V is vfsroot Volume Serial Number is 0122-B5C1 Directory of v:\mnt 05/22/2019 07:48 PM <DIR> . 05/22/2019 07:48 PM <DIR> .. 05/22/2019 07:48 PM10,995,116,277,760 file.vhdx 05/22/2019 07:48 PM 1,422 stats 2 File(s) 10,995,116,279,182 bytes 2 Dir(s) 5,242,880 bytes free
6. Configure the object storage disk as VHDX
For Windows to make use of object storage bucket we have to initialize the object storage as VHDX image. VHDX is preferred over VHD because of inherent journal feature to protect against unsafe shutdown and also it can support up to 64TB for a single image
- To create new VHDX image click mount/umount from the treeview pane.
- Select the Disk and Right-Click for the popup-menu and choose Create VHD menu option
7. Mount the VHDX image of object storage disk
- Select Disk and Right-Click to choose Mount VHD menu option to attach the VHDX image as Disk to Windows.
- Only for newly created VHDX image
Launch diskmgmt.msc to initialize disk for the first time and assign a drive letter. You may create a file system within Disk Management GUI or from Command Prompt.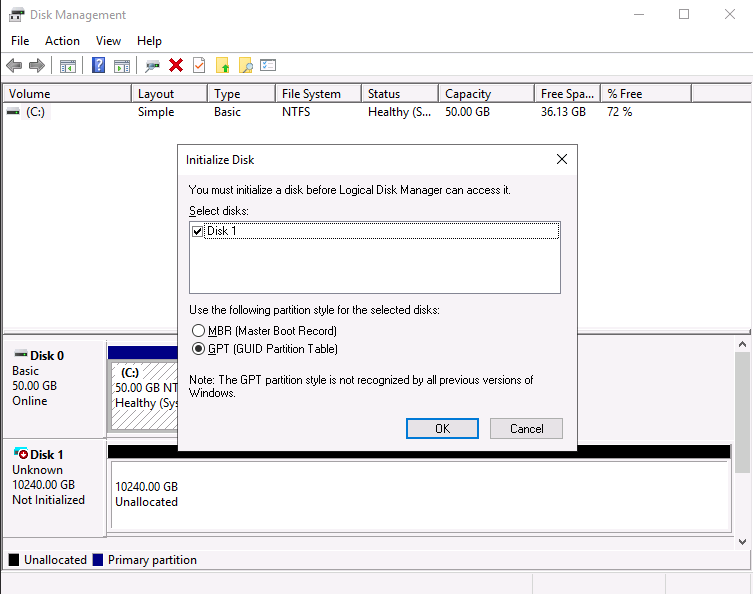
To Create a file system NTFS or ReFS from command prompt. Use the actual drive letter that was assigned from the above command and allocation size of 1MB is chosen to match with the block size used while configuring cloud disk.
Code Block language powershell title Format c:\users\Administrator> format /fs:ntfs /A:1M /q F:
Detach the virtual diskWarning title NTFS allocation size Windows 2019 supports allocation size of 1MB for NTFS file systems while earlier version limited to 64KB only. This means NTFS created with 1MB allocation size may not be recognized by older Windows.
Stop
8. Detach the VHDX image
To stop the objbaker service program
to proceed configuration as serviceFrom Desktop → Crossmeta command shell running as administrator
The above command would stop the objbacker program that is running inside another Command Prompt Window.for the disk the VHDX image as to be detached first.
- Select Disk and Right-Click to choose Umount VHD menu option
9. Stop the service of object storage disk
After detaching the VHDX image it is safe to proceed with stopping the service if needed.
- Select services → Disk and Right-Click to choose Stop menu option
Related pages